Pay Attention to the Small Details

by Sherri on June 3, 2009

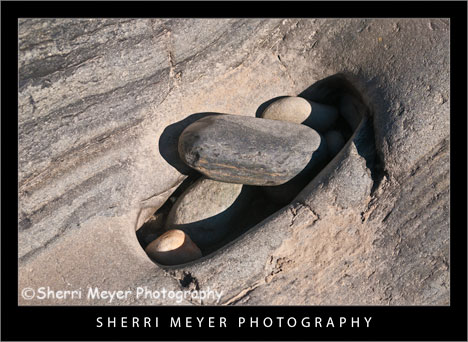
american-river-rocks American River Rocks, near Weimar, California. This is a close up photo of the large rock Peg was sitting on in this photo. These little rocks were arranged just like this, when I stumbled upon them. Holes like these are created by the water washing over the large rock into a small hole. When a little rock gets caught inside the small hole, it tumbles for a long time, making the hole bigger. Eventually, more rocks make their way into the hole as they did here. I could have missed this photo opportunity, if I hadn't paid attention to the smaller details in my "big picture." Thank you for visiting. If you would like to leave a comment, simply click on the "comments" link (add your message in the box) at the bottom of this post. You can also sign up for a "free" subscription to this Blog. Just look in the upper right hand side of the Blog under "Subscribe to Sherri's Blog." Then, either click on the orange button, or enter your email address and click on "subscribe." Visit our Stock Photo Website for links to photo galleries.

Baby Boomers Dance in the Sky

by Sherri on May 27, 2009

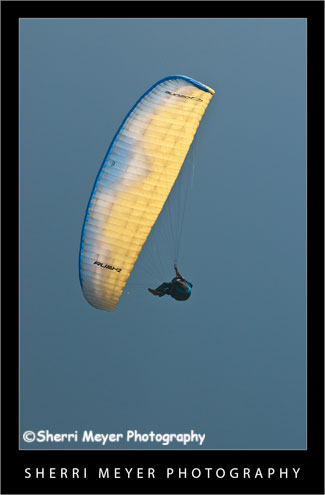
paragliding3

Paraglider getting a bird's eye view of the Cronan Ranch Regional Trails Park, Pilot Hill, California.

If you are looking for a great place to have a paragliding adventure, check out the Cronan Ranch Regional Trails Park. This shot was taken during our most recent hike at the Cronan Ranch. This guy (I think his name was Randy) was having a great flight and he put on a great show for the camera. As it turns out, the majority of the group (about 8-10) he was flying with that day were "Baby Boomers." That was really cool, because photographing active Baby Boomers is one of my specialties. I stumbled upon a gold mine, when I found these guys! [click to continue…]

Old Town Truckee, California

by Sherri on May 14, 2009

truckee-ca

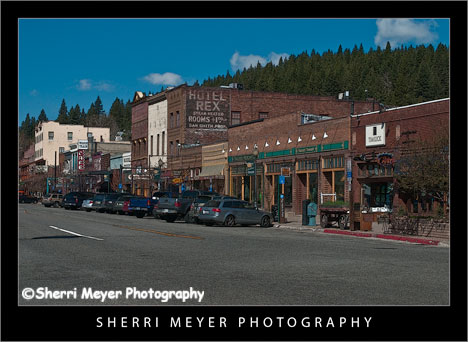
Digital Art photo of Old Town Truckee, California.

Truckee is perhaps one of the most charming and popular mountain towns in California. It is close to Lake Tahoe and offers year-round recreational opportunities. We stayed in Truckee at the "dog friendly" Inn at Truckee, during our recent road trip. I highly recommend this place if you are visiting the area with your pooch. It is very reasonable, has a spa and hot tub and even includes continental breakfast. It is also close to Old Town, which is one of the areas I was photographing during our stay in Truckee. Our dog, Cocoa, gives it 3 paws out of 4, based on the rating system in the California Dog Lover's Companion Guide Book. About the photo: I used my favorite creative filter in PhotoShop CS3 "Poster Edges" to achieve this look. Helpful links if you are planning a trip to the Truckee/Lake Tahoe area: http://www.truckee.com/ http://en.wikipedia.org/wiki/Truckee,_California http://www.innattruckee.com/home Thank you for visiting. If you would like to leave a comment, simply click on the "comments" link (add your message in the box) at the bottom of this post. You can also sign up for a "free" subscription to this Blog. Just look in the upper right hand side of the Blog under "Subscribe to Sherri's Blog." Then, either click on the orange button, or enter your email address and click on "subscribe." Visit our Stock Photo Website for links to photo galleries.

Quad Adventure in Truckee, California

by Sherri on May 4, 2009

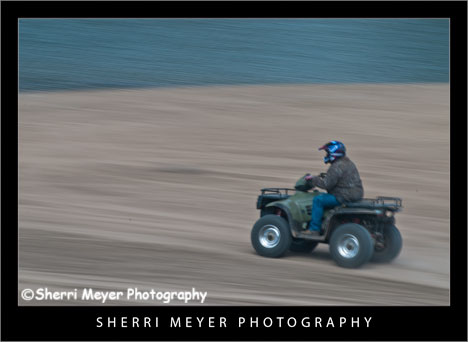
jeff-riding-quad Jeff riding his Quad along the shore of Prosser Reservoir, Truckee, California. This shot was taken during our recent road trip to the Truckee/Lake Tahoe area to capture travel, adventure and lifestyle photos for our stock files. The first stop during our road trip was at Prosser Reservoir for a little Quad fun and photos. This photo is one of my favorites from our photo shoot. Photo Details - In Camera This pan photo was shot on a Nikon D300 with a Nikon 70-200 zoom lens attached, using the following camera settings: ISO 100, shutter speed 1/10 sec., aperture f 20. Post processing in Lightroom I set the Clarity to +100 and the Vibrance to +45. Thank you for visiting. If you would like to leave a comment, simply click on the "comments" link (add your message in the box) at the bottom of this post. You can also sign up for a "free" subscription to this Blog. Just look in the upper right hand side of the Blog under "Subscribe to Sherri's Blog." Then, either click on the orange button, or enter your email address and click on "subscribe." Visit our Stock Photo Website for links to photo galleries.

Wild Iris

by Sherri on April 29, 2009

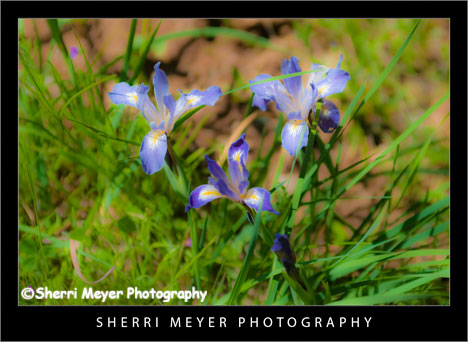
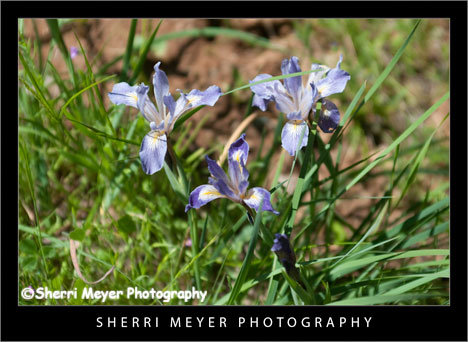
wild-iris2 Wild Sierra Iris, Cronan Ranch Regional Trails Park, near Coloma, California. These beautiful Wild Sierra Iris were growing along the trail at the Cronan Ranch Regional Trails Park, the day of our hike with friends. They are a common wildflower here in the Sierra Foothill's and can be found along many hiking trails. One of the other places I have found them is at Hidden Falls Regional Park in Auburn. The original image did nothing for me, but I didn't want to dump it. It was taken at 1:00 in the afternoon under harsh lighting. It also lacked vibrance. I decided to work with it a bit in Lightroom 2 and this is what I came up with. I set the Clarity to -100 to give it a softer look and set the Vibrance to +70, which made the colors pop. wild-iris3 This is what this photo looked like straight out of the camera. I have 2 questions for my viewers. 1. Which one do you like best? 2. Can you identify this species of Wild Iris? Thank you for visiting. If you would like to leave a comment, simply click on the "comments" link (add your message in the box) at the bottom of this post. You can also sign up for a "free" subscription to this Blog. Just look in the upper right hand side of the Blog under "Subscribe to Sherri's Blog." Then, either click on the orange button, or enter your email address and click on "subscribe." Visit our Stock Photo Website for links to photo galleries.

5 Simple & Fun Lightroom Tips

by Sherri on April 22, 2009

cronan-ranch5

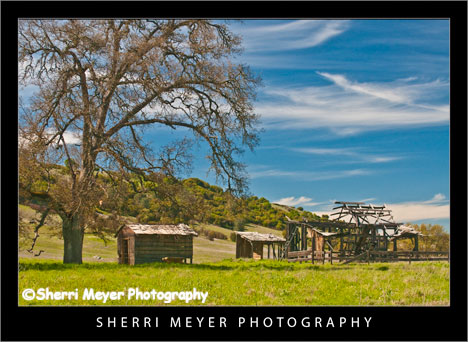
Love Comes Softly movie set at the Cronan Ranch, Pilot Hill, California.

For all you Lightroom lovers out there, here are a few simple tips you can try to improve your photos, or to simply give them a new look. Want to make your photos look like a painting? You can do this by simply adjusting the fill light. For this photo of the movie set, I adjusted the fill to 45. Make your colors pop. Try using the Vibrance Slider instead of the Saturation Slider. It will brighten up only the areas that need to be brightened up, not everything in the photo. In this photo of the Narcissus I adjusted the Vibrance to +100. Add "punch" to your photos using Clarity. Clarity adds midtone contrast to your photos, which makes them appear to have had the midtones sharpened. For this photo of the famous McArthur-Burney Falls in Northeastern California, I set the Clarity to +100. Give your photos a soft, diffused look using Clarity. To achieve a soft look, try adjusting the Clarity in the negative direction. In my photo of the Mystery Rider, I adjusted the clarity to -100. This also works really well when shooting portraits. Turn your color photo into an antique looking photo. You can do this easily by using the Antique Grayscale (similar to Sepia) Preset. Check out this photo of the Three Amigos. There is really no right or wrong. Just experiment and have fun! Thank you for visiting. If you would like to leave a comment, simply click on the "comments" link (add your message in the box) at the bottom of this post. You can also sign up for a "free" subscription to this Blog. Just look in the upper right hand side of the Blog under "Subscribe to Sherri's Blog." Then, either click on the orange button, or enter your email address and click on "subscribe." Visit our Stock Photo Website for links to photo galleries.

A Shot in the Dark

by Sherri on April 15, 2009

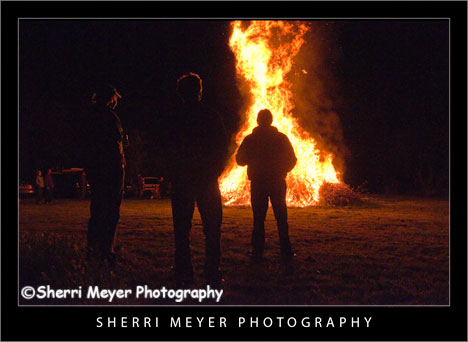
bonfire Three men standing around a bonfire in silhouette, Auburn, California, taken with the Nikon D300. This shot was taken at the annual April Fools party we attend nearly every year. I have always wanted to photograph the bonfire, but not bad enough to set up a tripod or use high speed film. Now that I have a Nikon D300, I decided to give it a try. I am very impressed with the quality of images that can be produced with this camera at night. It's also a lot of fun. If you own one of these cameras, I encourage you to go out for a night shoot and give it a shot. How I got the shot Camera settings for ISO, Shutter Speed and Aperture are as follows: ISO 3200, SS 1/400 sec., f 7.1. Thank you for visiting. If you would like to leave a comment, simply click on the "comments" link (add your message in the box) at the bottom of this post. You can also sign up for a "free" subscription to this Blog. Just look in the upper right hand side of the Blog under "Subscribe to Sherri's Blog." Then, either click on the orange button, or enter your email address and click on "subscribe." Visit our Stock Photo Website for links to photo galleries.
d300-double-exposure

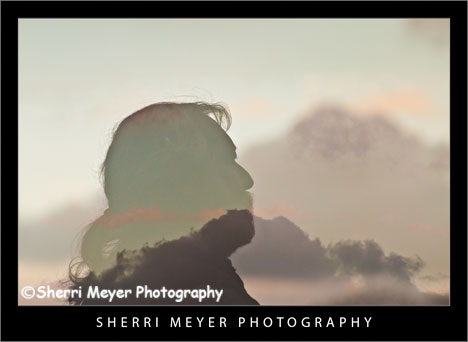
Photo #1 - Double exposure of a man in silhouette and a cloudy sky at sunset.

After writing my post "D300 Double Exposure" a couple of weeks ago, I've had several D300 owners contact me wanting to know how to make them. I decided since there was so much interest in this subject, I should write an article on "How to make multiple exposures with a Nikon D300." Making multiple exposures with the Nikon D300 is really quite simple. But, if you are like me, it's a lot easier to be shown or guided by someone, than it is reading the camera manual. Choosing a subject First, choose a subject you want to practice on. Don't be too particular about the subject at first. Just practice and have fun. You will learn what works and what doesn't. Also, there really isn't really a right or wrong way to do it. If it pleases you in the end, that's all that really matters.
d300-double-exposure3

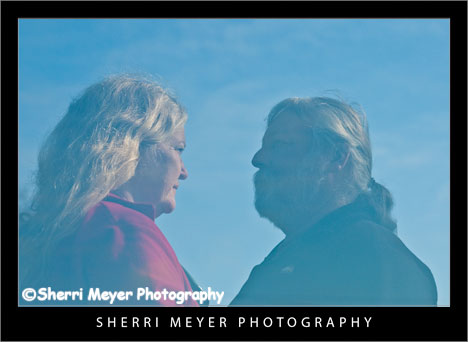
Photo #2 - Double exposure of a couple.

I have found that people make great subjects for multiple exposures. There are a lot of different ways you can shoot multiple exposures of people.
d300-double-exposure4

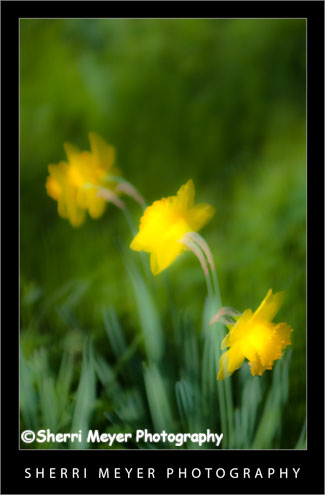
Photo #3 - Double exposure of a Daffodil Plant. In the 1st photo, I focused on the first flower. Then, the wind came up and I took the 2nd photo.

Flowers also work really well and have unlimited possibilities. You are really only limited by your imagination.
d300-multiple-exposure

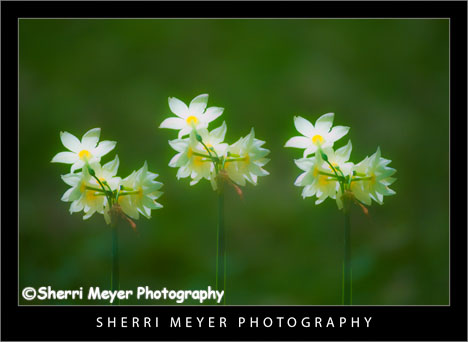
Photo #4 - Triple exposure of a Narcissus Plant.

Setting your Nikon D300 for multiple exposures
  • On the back of your camera, press the menu button at the upper left.
  • Select the shooting menu. Press right arrow on the multi selector button, to access the shooting menu.
  • Press the down arrow, until multiple exposure is highlighted.
  • Press right arrow and highlight number of shots. I recommend starting with 2 (the default), which gives you a double exposure.
  • Press the right arrow again and the number of shots will be highlighted. To change the number of shots, press the up or down button until the number you want is selected. Then, press the OK button.
  • Highlight auto gain and press the right arrow. Highlight either ON or OFF and press OK. Normally, you will want to leave the auto gain set to ON. This will automatically adjust the gain for multiple exposures. However, if your subject has a dark background, or you want to adjust the exposure manually, then set the auto gain to OFF.
  • Highlight done and press OK.
You are now ready to take your first shot. After taking your first shot, look in the monitor to see what you got. Then, frame and take your next shot. Note: After the first exposure is taken, if no operations are performed for 30 seconds, the camera will end the multiple exposure mode. Now, when you want to take another photo with the same amount of exposures, all you have to do is to return to the shooting menu, press the right arrow 2 times and your ready to take another multiple exposure. Other Tips Keep in mind that simple backgrounds work best. Also, the use of a tripod would make creating multiple exposures easier in some cases. However, I did not use one for any of these photos. How you can participate There are so many different ways to create a multiple exposure. Do you have any ideas you would like to share with the readers of this Photo Blog? Awesome! Feel free to add them in the comments section below. Thank you for visiting. If you would like to leave a comment, simply click on the "comments" link (add your message in the box) at the bottom of this post. You can also sign up for a "free" subscription to this Blog. Just look in the upper right hand side of the Blog under "Subscribe to Sherri's Blog." Then, either click on the orange button, or enter your email address and click on "subscribe." Visit our Stock Photo Website for links to photo galleries.
Spring Has Sprung!

by Sherri on March 29, 2009

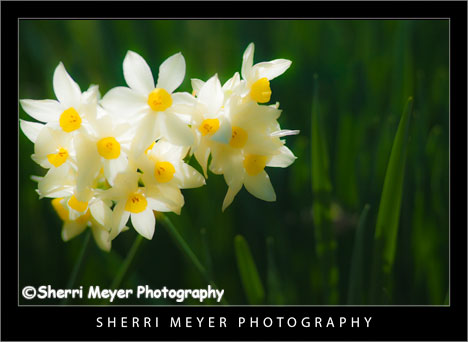
narcissus31 Narcissus blooming in my yard, Auburn, California. This photo of the Narcissus Plant was taken on the same day this Narcissus photo in my previous post was taken. How I got the shot These Narcissus were shot on a Nikon D300, with an 80-200 zoom lens attached. I choose 3:30 in the afternoon to photograph them, so I could take advantage of my favorite type of lighting, backlighting. The shutter speed, aperture and ISO used were: 1/2000 sec., f 4.0 and ISO 200. For post-processing in Lightroom 2.1, I set the Clarity to -100 to give it a soft look and pushed the Vibrance to +100 to add punch to the color. Coming Next - "How to make multiple exposures with a Nikon D300." Thank you for visiting. If you would like to leave a comment, simply click on the "comments" link (add your message in the box) at the bottom of this post. You can also sign up for a "free" subscription to this Blog. Just look in the upper right hand side of the Blog under "Subscribe to Sherri's Blog." Then, either click on the orange button, or enter your email address and click on "subscribe." Visit our Stock Photo Website for links to photo galleries.
Mystery Rider

by Sherri on March 23, 2009

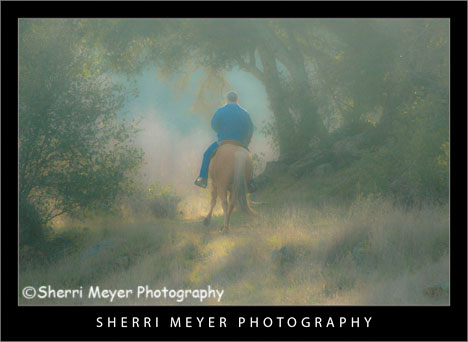
horseback8 Man riding his Palomino, Cronan Ranch, Pilot Hill, California. Yes, I am definitely "hooked on horses" lately! I couldn't resist capturing this guy riding his horse through this little opening in the oaks. It already had a mysterious look to the scene. So, I decided to add to that look, by doing a little experimenting in Adobe Lightroom 2.1. To get this look, I used the "Direct Positive" preset, which gave it the color tone. Then, I set the "Clarity" to -100 in the Develop Module. That gave it the dreamy, mysterious look. Thank you for visiting. If you would like to leave a comment, simply click on the "comments" link (add your message in the box) at the bottom of this post. You can also sign up for a "free" subscription to this Blog. Just look in the upper right hand side of the Blog under "Subscribe to Sherri's Blog." Then, either click on the orange button, or enter your email address and click on "subscribe." Visit our Stock Photo Website for links to photo galleries.