by Sherri on October 7, 2009

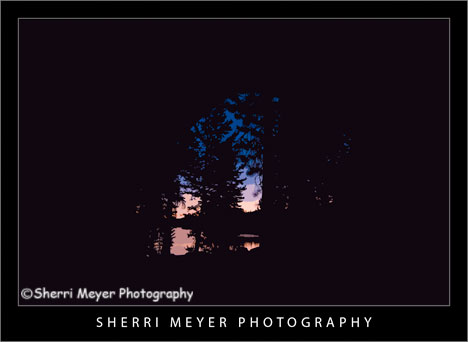
View of Utica Reservoir in Alpine County, CA at sunrise, from inside our tent.
Fall has arrived. That said, I will be wrapping up my summer series on Utica Reservoir soon. Then, my focus will be on Fall images.
This photo was shot from inside our tent at 5:30 in the morning. I didn’t feel like messing with the tripod, so I shot this at ISO 3200. My camera (Nikon D300) does very well at the higher ISO’s. I can also reduce the digital noise using Adobe Photoshop Lightroom. Even so, I couldn’t reduce the noise enough for my liking.
So, what did I do?
I took this image into Photoshop CS3 and applied “Cutout,” one of my favorite artistic filters. It did exactly what I hoped it would. It covered up all the noise and rendered an image that was pleasing to the eye.
I hope you like it!
Thank you for visiting. If you would like to leave a comment, simply click on the “comments” link (add your message in the box) at the bottom of this post.
Visit our Stock Photo Website for links to photo galleries.
by Sherri on September 22, 2009

Camp Fruit Salad, Utica Reservoir, Alpine County, California.
I’m not a Food Photographer. But, I like to pretend to be one once in awhile.
This photo was taken during our recent camping trip with friends to Utica Reservoir. Putting the salad and arrangement together was a collaboration. I had the Gingham tablecloth. Vicki had the blue enamel bowl. Kim supplied the cloth napkin. We all supplied the ingredients.
It was a lot of fun and I’m happy with the results. I think it will work just fine as a “Camping Stock Photo.”
The Makeover
Photo #1 – To develop this image, I used Adobe Photoshop Lightroom 2 Photo Management Software. To improve my original image (see below), I did the following:
- Created a Virtual Copy.
- Used the Nikon D300 Preset and increased the exposure by 1/2 of a stop.
- Set the Clarity to +40.
- Set the Vibrance to + 60.
Photo #2 – This is the way the photo looked straight out of the camera.

Camp Fruit Salad, Utica Reservoir, Alpine County, California.
I hope you enjoyed this photo makeover.
Thank you for visiting. If you would like to leave a comment, simply click on the “comments” link (add your message in the box) at the bottom of this post.
Visit our Stock Photo Website for links to photo galleries.
by Sherri on September 8, 2009

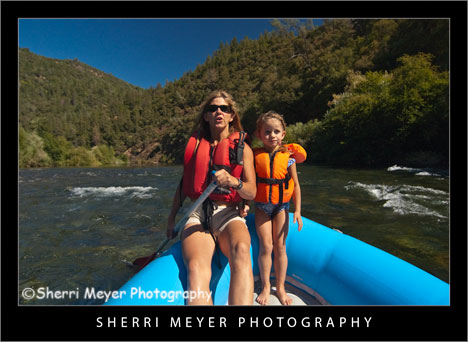
Donna & Maya Bussinger rafting on the Middle Fork of the American River, Auburn, California.
Donna & Maya Bussinger rafting on the Middle Fork of the American River, Auburn, California.
Yesterday was awesome! Jeff & I had the great opportunity to raft the Middle Fork of the American River (between Driver’s Flat and Mammoth Bar), with our friend Donna and her 4-year old daughter Maya.
This section of the the American River doesn’t draw the hoards of tourists from the Bay Area and LA like the South Fork does. There are a few reasons why. For one thing, it is only 7-miles in length. It also consists of only Class I & II rapids. Lastly, not many know about this run, which is why we love it so much. Now, I know after writing this a few more people will know about it. But, hey, if I don’t write about it someone else will. It may as well be me! [click to continue…]
by Sherri on August 18, 2009

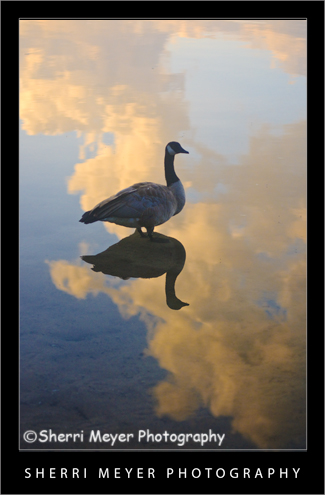
Goose silhouette, Utica Reservoir, Alpine County, California.
Goose silhouette, Utica Reservoir, Alpine County, California.
When you have a really good subject in front of you like this Goose, it’s always a good idea to shoot more than one photo of it. Try shooting your subject in both formats (vertical & horizontal) at the minimum. Here is the horizontal photo of this Goose, that I posted last week.
Which one do you prefer?
Thank you for visiting. If you would like to leave a comment, simply click on the “comments” link (add your message in the box) at the bottom of this post.
You can also sign up for a “free” subscription to this Blog. Just look in the upper right hand side of the Blog under “Subscribe to Sherri’s Blog.” Then, either click on the orange button, or enter your email address and click on “subscribe.”
Visit our Stock Photo Website for links to photo galleries.
by Sherri on June 29, 2009

Photo #1 – Historic Auburn Courthouse, Auburn, California.
This beautiful building has become one of my favorite local subjects to photograph. It is so close to home, I can return and capture it’s beauty each season, at different times of the day and under many different lighting situations!

Photo # 2 – This is what the photo looked like straight out of the camera.
The Makeover – (Lightroom)
- Added +25 fill light.
- Adjusted the Clarity to +100.
- Adjusted the Vibrance to +60.
That’s all folks. I hope you enjoyed this “Monday’s Makeover.” Opinions are always welcome!
Thank you for visiting. If you would like to leave a comment, simply click on the “comments” link (add your message in the box) at the bottom of this post.
You can also sign up for a “free” subscription to this Blog. Just look in the upper right hand side of the Blog under “Subscribe to Sherri’s Blog.” Then, either click on the orange button, or enter your email address and click on “subscribe.”
Visit our Stock Photo Website for links to photo galleries.
by Sherri on June 22, 2009

Photo #1 - Kayaking on the South Fork of the American River, near Coloma, California.
Today’s makeover is just for fun. This photo probably wouldn’t cut it for publication, but we don’t have to be serious all the time do we?
Every since I started using Lightroom 2, I haven’t done much with PhotoShop CS3. I used to love playing around with the filters and the distort filter Spherize was one of my favorites.

Photo #2 - This is what the photo looked like straight out of the camera.
The Makeover – (Lightroom)
- Created a Virtual Copy.
- Set White Balance to daylight.
- Used the Nikon D300 preset.
- Increased the Highlight Recovery to tone down the hot spots.
- Increased the Luminance Smoothing to reduce the unwanted noise.
The Makeover – (PhotoShop CS3)
I used the distort filter Spherize. What I like about this filter is that it brings the subject in closer. It also kind of looks like the photo has a frame around it.
I hope you enjoyed this “Monday’s Makeover.” Opinions are always welcome!
Thank you for visiting. If you would like to leave a comment, simply click on the “comments” link (add your message in the box) at the bottom of this post.
You can also sign up for a “free” subscription to this Blog. Just look in the upper right hand side of the Blog under “Subscribe to Sherri’s Blog.” Then, either click on the orange button, or enter your email address and click on “subscribe.”
Visit our Stock Photo Website for links to photo galleries.
by Sherri on June 17, 2009

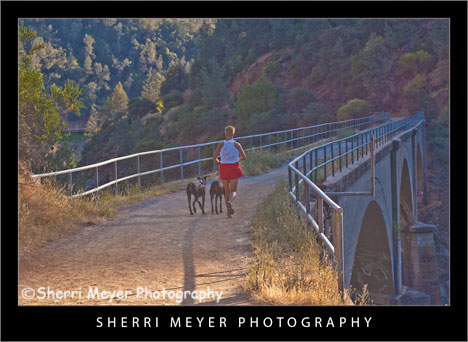
Woman running with her dogs across the famous “No Hands Bridge” in Auburn, California.
I chose to feature this photo in my “Wednesday’s WOW” post for a couple of reasons.
First of all, I really like it and secondly the annual Western States 100 Endurance Run is coming up June 27-28. If you have never heard of this race, it is a 100-mile foot race which starts in Squaw Valley, California and winds up in Auburn, California 100-miles later. The participants of this race will cross No Hands Bridge minutes before reaching the finish line at Placer High School. NOTE: This bridge is in both El Dorado and Placer counties. [click to continue…]
by Sherri on June 15, 2009

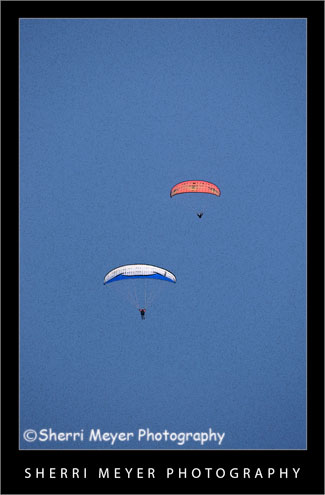
Photo #1 - Paragliding in the Sierra Foothills.

Photo #2 - Paragliding in the Sierra Foothills.
Sometimes I have a hard time tossing out a photo just because it’s out of focus. This photo is one of those photos. What I like to do when this happens is to apply my favorite artistic filter in PhotoShop CS3 “Poster Edges.”
Photo # 1 – In Lightroom 2, I set the White Balance to daylight and applied the Nikon D300 preset. Then, in PhotoShop CS3, I turned this out of focus photo into a digital art photo, by applying the “Poster Edges” filter.
Photo #2 – This is the way the NEF looked straight out of the camera.
Does this work for you? I’d love to hear your comments.
Thank you for visiting. If you would like to leave a comment, simply click on the “comments” link (add your message in the box) at the bottom of this post.
You can also sign up for a “free” subscription to this Blog. Just look in the upper right hand side of the Blog under “Subscribe to Sherri’s Blog.” Then, either click on the orange button, or enter your email address and click on “subscribe.”
Visit our Stock Photo Website for links to photo galleries.
by Sherri on June 12, 2009

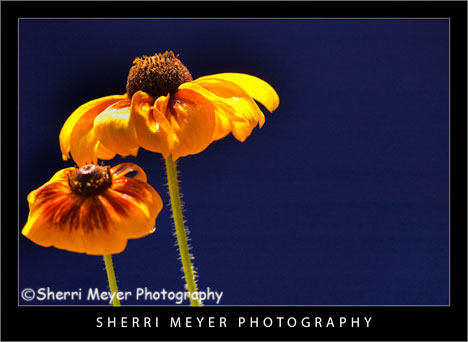
Gloriosa Daisy in my yard. In Lightroom, I changed the White Balance to daylight and used the Nikon D300 preset. I also touched up a few hot spots on the petals with the “Recovery Slider.”
As a fairly new and totally hooked Lightroom user, I am always looking for great Lightroom tips. Each week, I keep my eyes wide-open for information I feel is worthy of passing along to other Lightroom users, or those thinking about becoming one. Hopefully, you will find useful information or you will pick up a few new folks to follow.
Here are my “Top 10 Lightroom Tweets of the Week” in no particular order. Enjoy! [click to continue…]
by Sherri on June 8, 2009

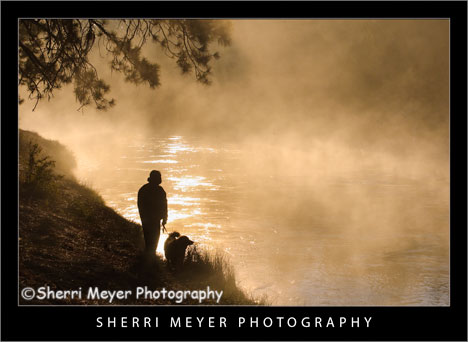
Photo #1 – A foggy morning along the Deschutes River, Oregon.
Today, I’m starting “Makeover Monday.” Each week, I’m going to select one image from our Lightroom catalog (NEF) and give it a makeover. NEF files straight out of the camera are dull and can always be improved with processing.
I will post both images; the image straight out of the camera and the image with the makeover. Then, I will explain what I did to achieve the results I wanted.
This image was selected for a makeover because, it is one of a series of images we are presently developing, to be uploaded soon to our Baby Boomer gallery.

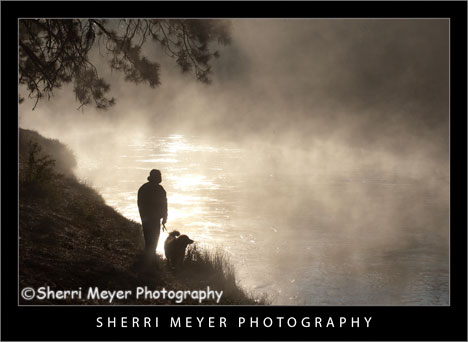
Photo #2 – A foggy morning along the Deschutes River, Oregon.
Photo #1 – to get the results above, I changed the White Balance to Daylight to warm it up a bit. Then, I applied this wonderful Nikon D300 Preset developed by Christian LøverÃ¥s of Oslo, Norway. We just started using this preset yesterday and we love it! I then used the Adjustment Brush to tone down the over exposed glare on the water.
Photo #2 – this is the NEF the way it looked straight out of the camera.
Which one do you like best?
Thank you for visiting. If you would like to leave a comment, simply click on the “comments” link (add your message in the box) at the bottom of this post.
You can also sign up for a “free” subscription to this Blog. Just look in the upper right hand side of the Blog under “Subscribe to Sherri’s Blog.” Then, either click on the orange button, or enter your email address and click on “subscribe.”
Visit our Stock Photo Website for links to photo galleries.
