Photo – Digital art photo created from an out-of-focus original photograph
I’m not a wildlife photographer per se, but when an opportunity presents itself like it did here, I’d be a fool not to try to capture it.
Photo – Digital art photo created from an out-of-focus original photograph
I’m not a wildlife photographer per se, but when an opportunity presents itself like it did here, I’d be a fool not to try to capture it.
Photo – Digital art photo created from an original photograph
Last week, I posted the photo above and had viewers guess how it was created. Thank you, Richard Wong, for your participation in the guessing game. Thanks also to all of you that studied it, but decided not to participate.
Here is how it was shot
It had been raining for several hours. After it stopped, I went out to the deck to dump the water out of the chairs. You know, the really popular outdoor folding chairs almost everyone has? Fortunately, I looked at the puddle that had collected in the chair before dumping it. Floating in the puddle were these beautiful Oak leaves and the lighting was just right. I went and got my camera and took a series of shots before dumping the chair. Â
This is how it was processed in PhotoShopÂ
Step 1 – Image Adjustment
Step 2 – Selected Hue/Saturation
Step 3 - In edit, changed the setting from master to blue.Â
Step 4 – Gave it a +70 in saturation.Â
Step 5 – Selected Filters
Step 6 – Selected Poster Edges
Now that the cat is out of the bag, how many of you had it right all along?
Photo - Digital art photo of Oak leaves in Auburn, CA, created from an original photograph
This photo was shot on my deck right after a nice, long, rain.
Any guesses as to how it was created? I’d love to hear from you. I will keep you guessing for a few days, before I reveal the details.
Have fun!
Photo – Aspen grove revised (cut both the saturation and the underexposure by 1/2)
For those of you that have been adding your comments regarding this Aspen grove shot, I’ve added the 3rd shot that I hope will be the pick of the pics.
What do you think?
Photo # 1 – As shot (Aspen grove near Bridgeport, CA)
Photo # 2 was underexposed, then saturated (Aspen grove near Bridgport, CA)
It looks like we are not going to get in a fall color shoot this year in the high country. We were in Sierra County, near Truckee about 3 weeks ago and we were too early. Now, it’s too late. So I decided to put up a photo from our fall colors trip last October, along scenic highway 395. Actually, I’m putting up 2 of them again and I would love your opinion on which one you prefer. I will go ahead and give you my opinion. I prefer #2. But, I loved #1 until I started experimenting with it.
I’m learning that just about any photo can be improved, even when you think it can’t. But, then again, that’s just my opinion!

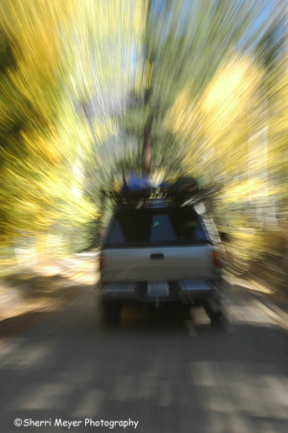
Photo #1 - Tundra with kayaks, Alpine County, CA. This photo was shot at 1/15 sec as the Tundra was moving.
“Have you become obsessed with one aspect of photography?” That was a question asked recently on one of the photo forums I contribute to. That got me thinking. Lately, it seems I have a “love affair” with zooming.
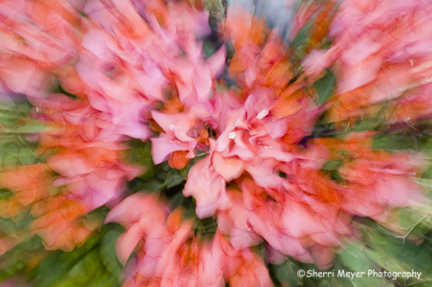
Zooming is similar to panning, but instead of following the subject with your camera as it moves across your field of view, you zoom the lens in or out during your exposure. This creates a streaking effect around the edges of your photograph, while keeping the center of your photograph fairly sharp.

Photo #2 - Bougainvilleas, Cabo San Lucas, Baja California. This photo was shot at 1/5 sec. I also fired my flash.
Tips for creating great zooms
Feel free to add your zooming tips. You do not need to register or login to comment on this blog.
Happy zooming!
There have been a few questions lately on different forums regarding panning photos. So I decided to post my tips for panning success here on my blog.
If you are not sure what panning is, let me explain. Have you ever seen a photo where the subject is in focus and the background is blurred? That is a pan.  Panning is great for showing motion, eliminating unwanted backgrounds and when working in low light.
About a decade ago, I wanted to get proficient at shooting action, so I started photographing mountain bike races. It was during that time that I learned how to pan.
Here are my tips for success.
Photo #1 – The mountain biker was traveling at approximately 8 MPH, so I shot him at 1/8 sec. In order to accomplish the results I wanted, I used Fuji Velvia 50 film. There was way too much light that day, so to be able to use that slow of a shutter speed even with the slow ISO 50 film, I had to add a polarizer. I did not use a tripod for this shot.
My friend Donna was running at approximately 4 MPH, so I shot this one at 1/4 sec. This was taken early in the morning, so I did not have to add a polarizer. It was shot with either Fuji Velvia 50 or Fuji Provia 100. I did not use a tripod for this shot either.
This shot of my husband Jeff blasting down a dirt road in Death Valley, was taken at at 1/30 sec., as he was traveling at approximately 30 MPH. It was taken with a digital camera set at ISO 200 during the late afternoon, so a polarizer was not needed. Again, no tripod was used.