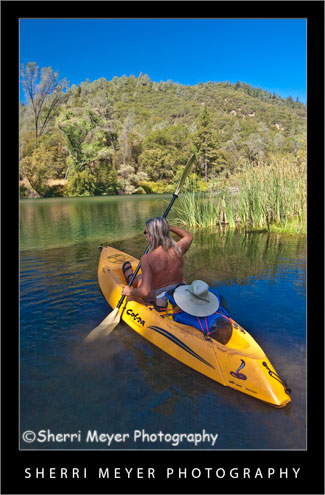
by Sherri on July 17, 2009
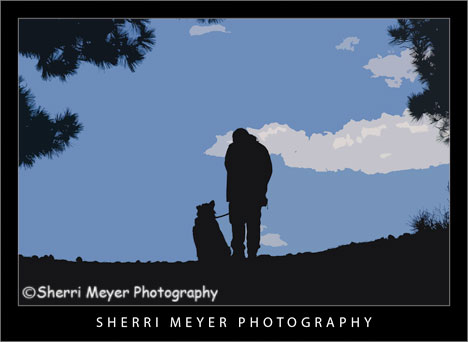 Digital art photo of Jeff & Cocoa in silhouette, near Truckee, California.
Howdy folks! It’s that time of the week again. Are you ready for 12 more really awesome Lightroom Tweets? Well, that’s just what your going to get. This week you are going to get 10 plus 2 bonus tweets. Enjoy!
Here are your 12 Lightroom Tweets of the Week in random order. [click to continue…]
by Sherri on July 15, 2009
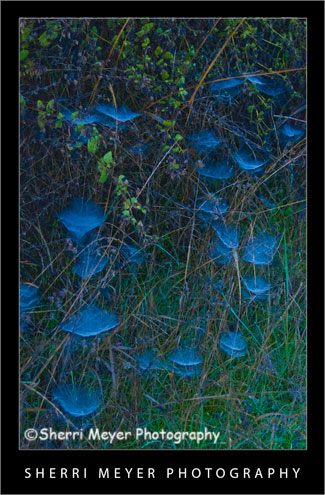
 Backlit spider webs covered with dew, Auburn, California.
One fall morning while on a hike, I found these webs all lit up beautifully with backlighting and covered with dew.
Why this photo makes me say WOW!
- Backlighting – Backlighting is one of my favorite types of lighting. I think it worked really well here.
- Colors – I really love green & blue together. I think the two colors compliment each other well. Our house is even decorated with green & blue.
- Uniqueness – It’s not every day you get to witness dewey, backlit spider webs. If it hadn’t been for the fact that I was trying out my brand new first DSLR (a Nikon D70) and looking for things to photograph, I could have missed this opportunity. The others I was hiking with didn’t even notice them!
I hope you keep your eyes wide-open next time you are out and about with your camera. You just never know what you might stumble upon!
Thank you for visiting. If you would like to leave a comment, simply click on the “comments” link (add your message in the box) at the bottom of this post.
You can also sign up for a “free” subscription to this Blog. Just look in the upper right hand side of the Blog under “Subscribe to Sherri’s Blog.” Then, either click on the orange button, or enter your email address and click on “subscribe.”
Visit our Stock Photo Website for links to photo galleries.
by Sherri on July 13, 2009

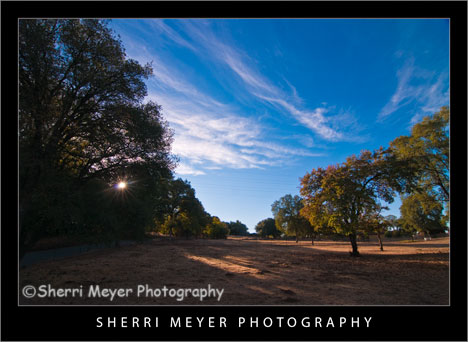
Photo #1 - My neighborhood, rural Auburn, California.
While looking through my images this morning for an image to makeover, I came across this one. This is very much the way the lighting would look at this location if we were walking right now.

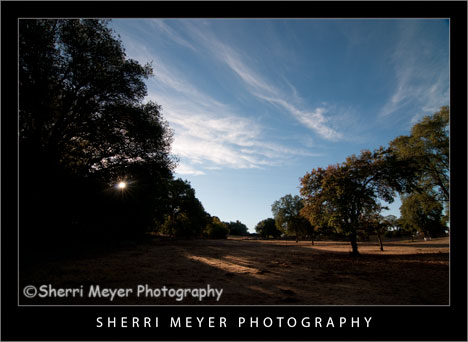
Photo #2 - This is the way the photo looked straight out of the camera.
Can you guess what I did to photo #2 below to get the results you see in the top photo? Bring on the guesses. I’d love to hear from you. While it’s pretty tough to guess exactly what all was done, some of you come pretty darn close. I will reveal the answers later in the week. Thank you in advance for your participation!
Thank you for visiting. If you would like to leave a comment, simply click on the “comments” link (add your message in the box) at the bottom of this post.
You can also sign up for a “free” subscription to this Blog. Just look in the upper right hand side of the Blog under “Subscribe to Sherri’s Blog.” Then, either click on the orange button, or enter your email address and click on “subscribe.”
Visit our Stock Photo Website for links to photo galleries.
Monday’s Makeover Update:
Well, I didn’t get a whole lot of responses, but thanks to Matt and Hali for your participation! Here is what I did in Lightroom to improve my original photo:
- Made a virtual copy.
- Set white balance to daylight.
- Set recovery to 10.
- Set fill light to 25.
- Set blacks to 0.
- Set clarity to 50.
- Set vibrance to 80.
NOTE: Unfortunately, I don’t have time to post a Monday Makeover this week. I have taken on a few new projects that are eating up my blogging time.
by Sherri on July 10, 2009

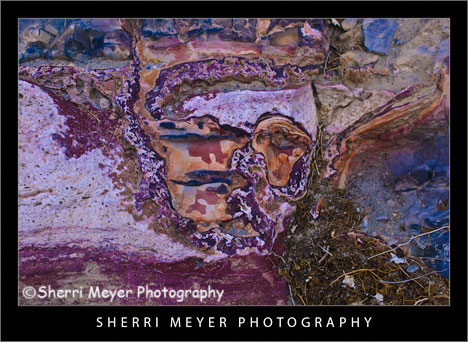
Death Valley Nature Abstract – One of my favorite subjects to photograph when I’m not photographing people is nature close-ups. While Jeff & I were exploring Cottonwood Canyon in Death Valley National Park a couple years ago, I spotted this “Face in the desert.” I wasn’t leaving until I got a photo of it I was happy with. Of course, the original didn’t look this good. Using the amazing Adobe PhotoShop Lightroom 2 Photo Management Software, I was able to achieve the results you see here.
Do you see what I see? I see a face with one eye open and one eye closed. There is even a mouth. The nose is pretty deformed. I’d love to hear your opinions about this photo. [click to continue…]
by Sherri on July 6, 2009

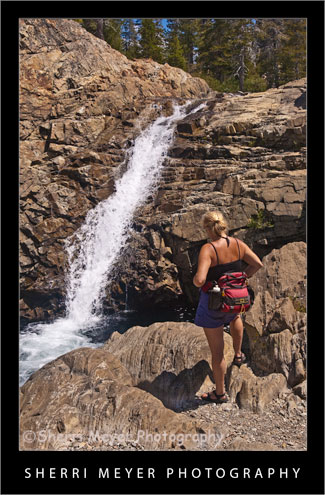
Photo # 1 - Hiker viewing one of several waterfalls on Canyon Creek, near Lake Faucherie, Tahoe National Forest, California.
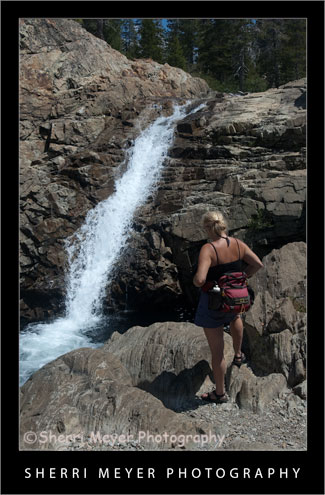
Can you guess what I did to photo #2 (below) in Lightroom to achieve the results you see in #1? This week I’m doing something a little different with my Monday Makeover. Instead of telling you what I did, I am curious to see if you can guess what I did. I will let the cat out of the bag, after I get a few responses.

Photo #2 - This is what the photo looked like straight out of the camera.
Thank you for visiting. If you would like to leave a comment, simply click on the “comments” link (add your message in the box) at the bottom of this post.
You can also sign up for a “free” subscription to this Blog. Just look in the upper right hand side of the Blog under “Subscribe to Sherri’s Blog.” Then, either click on the orange button, or enter your email address and click on “subscribe.”
Visit our Stock Photo Website for links to photo galleries.
Photo Update – the cat is out of the bag! (July 10th)
Thanks to all of you that gave your best shot at guessing what I did during this photo makeover. I won’t make you wait a minute longer. I am now letting the cat out of the bag. Here is what I did to the original photo in Lightroom 2.
- Set White Balance to daylight.
- Set the Fill Light to +40.
- Set the Clarity to +100.
- Set the Vibrance to +70.
That’s it folks. Thanks again for your participation and for your patience!
by Sherri on July 3, 2009

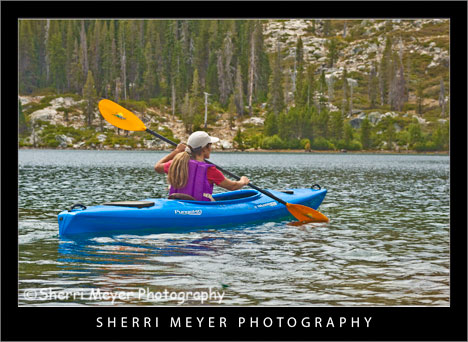
I took this photo of my friend Peg, during our kayak adventure on Lake Faucherie, Tahoe National Forest, California.
As promised, you are going to get twice as many top Lightroom Tweets this week. I hope you will find them useful. If not, maybe you will find some new and interesting people to follow on Twitter. Have a great weekend everyone and Happy 4th of July!
Here are 20 awesome Lightroom Tweets handpicked especially for you! As always, they are in no particular order. [click to continue…]
by Sherri on June 29, 2009

Photo #1 – Historic Auburn Courthouse, Auburn, California.
This beautiful building has become one of my favorite local subjects to photograph. It is so close to home, I can return and capture it’s beauty each season, at different times of the day and under many different lighting situations!

Photo # 2 – This is what the photo looked like straight out of the camera.
The Makeover – (Lightroom)
- Added +25 fill light.
- Adjusted the Clarity to +100.
- Adjusted the Vibrance to +60.
That’s all folks. I hope you enjoyed this “Monday’s Makeover.” Opinions are always welcome!
Thank you for visiting. If you would like to leave a comment, simply click on the “comments” link (add your message in the box) at the bottom of this post.
You can also sign up for a “free” subscription to this Blog. Just look in the upper right hand side of the Blog under “Subscribe to Sherri’s Blog.” Then, either click on the orange button, or enter your email address and click on “subscribe.”
Visit our Stock Photo Website for links to photo galleries.
by Sherri on June 26, 2009

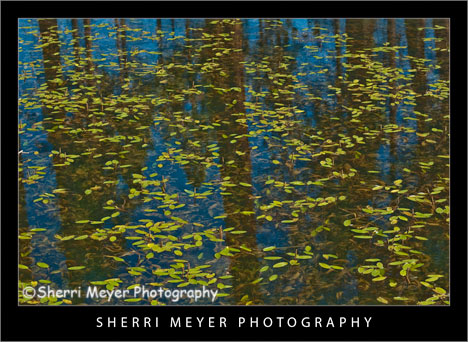
Leaves floating on Blue Lake in the Warner Mountains, Northeastern California.
It’s hard to believe another week has rolled around already and it’s time for another “Top 10 Lightroom Tweets of the Week.”
As Lightroom continues to explode, it is getting harder and harder to keep this list to 10. I’m thinking I might have to make it the “Top 20 Lightroom Tweets of the Week” for next weeks post. I guess that’s a good thing!
I hope you all are having a great week and you are having fun with Lightroom. In no particular order, here is the awesome list I put together for YOU this week. Enjoy and have a great weekend! [click to continue…]
by Sherri on June 22, 2009

Photo #1 - Kayaking on the South Fork of the American River, near Coloma, California.
Today’s makeover is just for fun. This photo probably wouldn’t cut it for publication, but we don’t have to be serious all the time do we?
Every since I started using Lightroom 2, I haven’t done much with PhotoShop CS3. I used to love playing around with the filters and the distort filter Spherize was one of my favorites.

Photo #2 - This is what the photo looked like straight out of the camera.
The Makeover – (Lightroom)
- Created a Virtual Copy.
- Set White Balance to daylight.
- Used the Nikon D300 preset.
- Increased the Highlight Recovery to tone down the hot spots.
- Increased the Luminance Smoothing to reduce the unwanted noise.
The Makeover – (PhotoShop CS3)
I used the distort filter Spherize. What I like about this filter is that it brings the subject in closer. It also kind of looks like the photo has a frame around it.
I hope you enjoyed this “Monday’s Makeover.” Opinions are always welcome!
Thank you for visiting. If you would like to leave a comment, simply click on the “comments” link (add your message in the box) at the bottom of this post.
You can also sign up for a “free” subscription to this Blog. Just look in the upper right hand side of the Blog under “Subscribe to Sherri’s Blog.” Then, either click on the orange button, or enter your email address and click on “subscribe.”
Visit our Stock Photo Website for links to photo galleries.
by Sherri on June 19, 2009

Kayaking Lake Clementine, Auburn, California.
Back by popular demand is another round-up of favorite Lightroom tweets. Once again, I have way too many to include in this post. That means, I will be doing the same thing again next week.
Thank you to all of you who either commented on last week’s blog post, started following me on Twitter, retweeted me, or included me in a post. A HUGE thanks to @MattKloskowski for featuring me on worth-a-click on the Adobe Lightroom Killer Tips Website. [click to continue…]
 Digital art photo of Jeff & Cocoa in silhouette, near Truckee, California.