How to Shoot Great Pans!

by Sherri on May 31, 2007

bike-racer.jpg

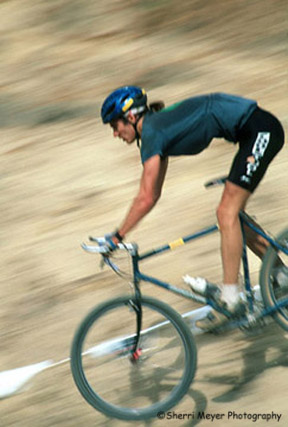
Photo #1 - Mountain Bike Racer, Colfax, California.

There have been a few questions lately on different forums regarding panning photos. So I decided to post my tips for panning success here on my blog. If you are not sure what panning is, let me explain. Have you ever seen a photo where the subject is in focus and the background is blurred? That is a pan.  Panning is great for showing motion, eliminating unwanted backgrounds and when working in low light. About a decade ago, I wanted to get proficient at shooting action, so I started photographing mountain bike races. It was during that time that I learned how to pan. Here are my tips for success.
  1. In order to achieve good panning results, you need to shoot the subject at or near the speed it is traveling. For instance, if shooting a mountain bike racer traveling at approximately 8 MPH, use a 1/8 sec. shutter speed.
  2. Subjects moving fairly fast work the best.
  3. You will need to use a slow film, or the slowest ISO on your digital camera, unless you are working in low light.
  4. To slow your shutter speed down even more, you can add a polarizer.
  5. Set your desired shutter speed and determine where you plan to take the photo. Begin tracking your subject well before it reaches that spot. Depress the shutter as the subject passes your predetermined spot and contiunue to follow the subject until it has passed you. If your camera has a continuous shooting mode, take a series each time the subject passes by.
  6. Although it is recommended that you use a tripod to achieve great results, I rarely use one.
Photo #1 - The mountain biker was traveling at approximately 8 MPH, so I shot him at 1/8 sec. In order to accomplish the results I wanted, I used Fuji Velvia 50 film. There was way too much light that day, so to be able to use that slow of a shutter speed even with the slow ISO 50 film, I had to add a polarizer. I did not use a tripod for this shot.
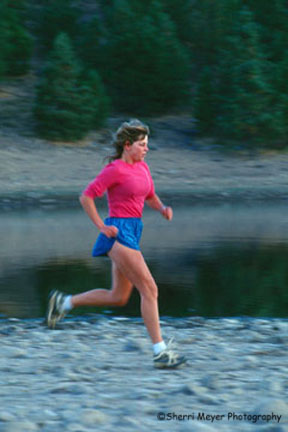
donna.jpg

Photo #2 - Donna Bussinger running at Stampede Reservoir, near Truckee, California.

My friend Donna was running at approximately 4 MPH, so I shot this one at 1/4 sec. This was taken early in the morning, so I did not have to add a polarizer. It was shot with either Fuji Velvia 50 or Fuji Provia 100. I did not use a tripod for this shot either.
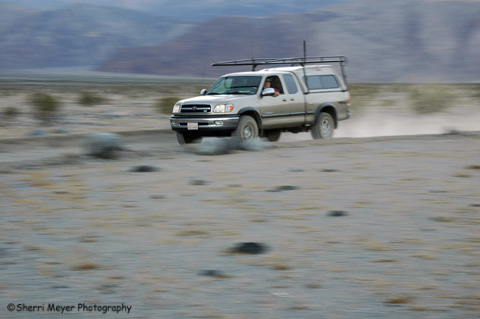
tundra.jpg

Photo #3 - Jeff Meyer driving the Tundra, near Stovepipe Wells in Death Valley, California.

This shot of my husband Jeff blasting down a dirt road in Death Valley, was taken at at 1/30 sec., as he was traveling at approximately 30 MPH. It was taken with a digital camera set at ISO 200 during the late afternoon, so a polarizer was not needed. Again, no tripod was used.
digital-art-of-t-shirt-shop.jpg  Digital art photo of T-shirts, made from an original photograph  While Jeff & I were gobbling down our first authenic Mexican Tacos during our recent trip to Cabo, we couldn't help but notice the variety of t-shirts available. We didn't really have time to read them all, so I decided to take a photo of this display instead and read them later. 

Hot photo tip round-up

by Sherri on May 22, 2007

It's time for a round-up. Not the usual kind of round-up, but a photo tip round-up of 16 hot photo tips that I have posted in the past. You will need to go to my photo tips category to read the tips in their entirety.  If you have any photo tips you would like to add, please feel free to do so by commenting. You do not need to register and login to add a comment on this blog! Thanks for visiting and check back often to see what's new!
  1. When in doubt, leave it out - the sky that is!
  2. Find a unique perspective.
  3. Try a 10-minute photo shoot.
  4. Shoot in themes.
  5. Set up self-assignments.
  6. Use dramatic lighting.
  7. Shoot it before it's too late.
  8. Move closer.
  9. Get it right in the camera first.
  10. Frame your subject.
  11. 10 ways to shoot a subject.
  12. Use contrasts for added impact.
  13. Try squinting.
  14. Shoot multiple frames.
  15. Always carry a spare battery.
  16. The color red - don't leave home without it.

5 top reasons to go digital!

by Sherri on March 6, 2007

Are you having a hard time deciding on whether or not to go digital? I did. Why? Because, I loved looking at my slides on a slide sorter. I loved my Nikon N90s. I didn't want to purchase another camera. And I didn't want to endure the digital learning curve. But, the truth is, there are more reasons to go digital than there are not to. Here are 5 top reasons to jump on the digital bandwagon. 
  1. Instant feedback. You can view your images as you shoot, enabling you to become a better photographer quicker.
  2. Delete as you go. Unlike shooting with film, you can delete the obvious bad images as you shoot.
  3. More affordable. Once your purchase your camera and lenses, your expenses are minimal. I purchased a digital SLR that was compatable with my N90s lenses, which also kept the costs down a bunch. Check out dpreview.com for digial camera reviews.
  4. Many ISO settings to choose from. You don't have to buy different types of film for different shooting situations.
  5. Shooting data recorded. No more writing down what you did to capure your images. The data is recorded as you shoot.
There are many more benefits to shooting digital. But, hopefully, this partial list will jumpstart your decision making process!
Got 10 minutes? Sometimes that's all the time we have for certain things. You have probably heard of the 10 minute exercise workout and the 10 minute meditation right? Well, now there is the 10 minute photo shoot! One day, when I needed to try out a feature on my camera in a hurry, download the images and perform a critique on what I had done, I came up with the idea of a 10 minue photo shoot. My goal was to shoot for 10 minues only and to create as good of images in a hurry as I could. It worked and it was fun! It forced me to take a closer look at my home environment. I saw things to photograph that I never noticed before, learned a new feature of my camera and satisfied my need for taking a few photos. So, if you are feeling the need to photograph and you only have 10 minues give it a shot!

10 Ways to Shoot a Subject!

by Sherri on March 1, 2007

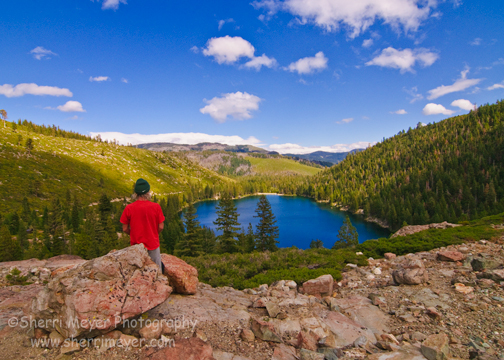
See #6 below - Jeff Hartnett enjoying the view of Lower Sardine Lake, Northern California.

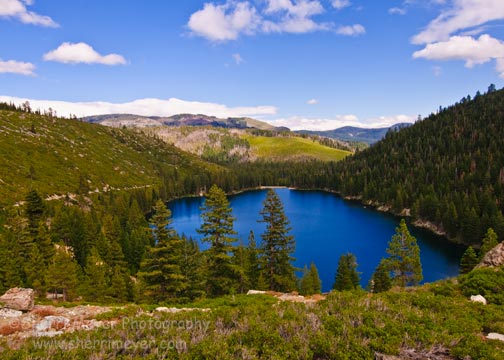
See #6 below -Â Lower Sardine Lake, Northern California.

When you have a great subject in front of you, shoot it as many ways as possible. If you are traveling and it is a subject you may never be able to shoot again, this is especially important! If the subject is local, then you can return again and again if you make the effort. Here are some things to incorporate into your shooting.
  1. Try shooting your subject during sunrise and sunset on sunny days.
  2. Shoot during midday on an overcast day.
  3. Shoot it in different weather conditions such as the rain, snow or fog.
  4. Shoot it at night.
  5. Shoot it in both horizontal and vertical formats.
  6. Shoot it with and without people.
  7. Use different lenses such as a wide-angle and a zoom lens.
  8. Use backlighting (light coming from behind the subject) and sidelighting (light coming from either side of the subject) for added impact.
  9. Try shooting from different perspectives. Lay on the ground and shoot upward and get on something high and shoot downward.
  10. Use a fast shutter speed to stop action, then use a slow shutter speed to show motion.
This is a partial list of the things you can incorporate into your shooting and not all of them apply to each subject. Happy shooting!
If there is anything you  have always wanted to photograph, do it before it's too late!  Some of the oldest buildings in Old Town Auburn, California (USA), caught fire before I ever got them photographed. I guess I just assumed they would always be there and I could photograph them anytime. The Shanghai Bar also located in Old Town Auburn didn't burn down, but it closed before I could get a good shot of it. The neighbor sold her beautiful Paint horse before I got a good shot of her. Now, I make a list of the important things in our area that I want to photograph and photograph them sooner rather than later.  You can't assume they will always be around.  This morning, I couldn't log on to my computer first thing as I usually do. A storm blew in yesterday and dumped 3-4 inches of snow covering our Sattelite Dish. I took the opportunity to go out and photograph our neighborhood, since it's rare for us to have snow, or at least enough to stick. And who knows when it will happen again? It also gave me something to write about. Next time you think of something you really want to photograph, do it sooner rather than later, because later may never happen!

Use Contrasts for Added Impact!

by Sherri on February 27, 2007

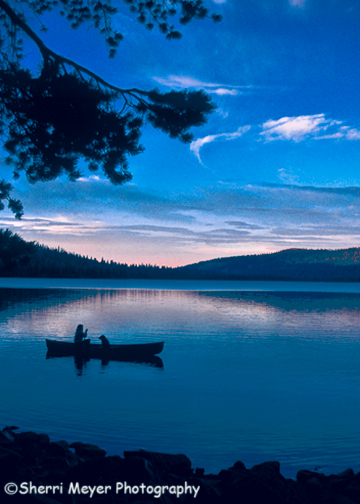
Sherri and Sierra canoeing on Gold Lake, California.

One great way to add impact to your photographs is by using contrasts. Contrast can make your subject really stand out from the rest of the image. For instance, a bright subject photographed against a dark background, or a dark silhouette against a bright background really adds impact to a photograph. There are many ways you can implement the use of contrasts in your photographs. I have listed below a few other suggestions for you to try.
  • Happy/Sad
  • Male/Female
  • Large/Small
  • Hard/Soft
  • Tall/Short
  • Young/Old
  • Static/Motion
  • Close/Far
  • Hot/Cold
  • Rough/Smooth
  • Living/Dead
  • Hot photo tip of the day – shoot in themes!

    by Sherri on February 26, 2007

    Instead of going out and shooting anything and everything (photos that is!), why not develop strong collections of the subjects you are passionate about? This is a really good thing to do if you plan on marketing your images, as well as putting together a slide/digital show of your images for your friends and family. If you don't currently have any favorite things you like to shoot, or you are not quite sure what "themes" are, here is a very partial list of ideas you can choose from, or you can come up with your own.
    1. Abstract
    2. Automobiles
    3. Boats
    4. California
    5. City life
    6. Emotions
    7. Humorous
    8. Pets
    9. Rural life
    10. Sports and recreation
    Happy shooting!

    Hot photo tip of the day – frame your subject!

    by Sherri on February 23, 2007

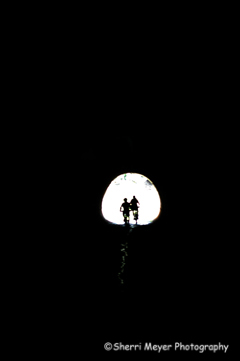
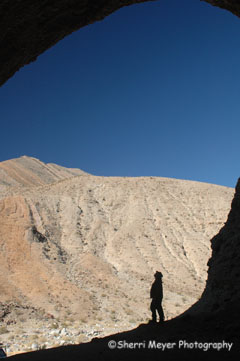
    Are you looking for more creative ways to add impact to your photographs? Try framing your subject. The use of framing is not anything new, but if you haven't tried it by now, I suggest you give it a whirl. There are many ways to do this. Here are a few suggestions to get you going.
    1. Shoot from inside a tent. You will need a fairly wide angle lens to do this.
    2. Use a doorway to frame your subject.
    3. Framing with trees is a very commonly used way of framing.
    4. Shoot from inside a cave. Again, you will need a wide angle lens.
    5. Shoot from inside a tunnel.
    6. You can also use an archway or a car window!
    As you start using this technique, you will begin to see more and more ways to implement it. Below are two examples of how I have used framing to add impact to my photographs.  mb-tunnel.jpg Photo - A tunnel in Auburn, CA (USA) jeff-dv.jpg Photo - A cave in Death Valley National Park, CA (USA)