by Sherri on June 8, 2009
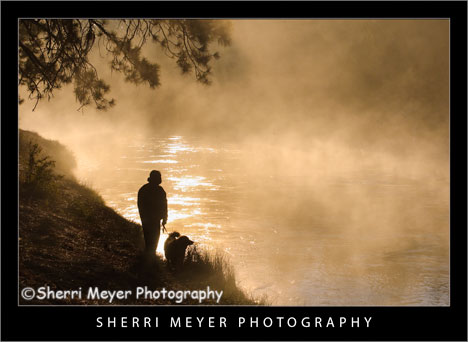 Photo #1 - A foggy morning along the Deschutes River, Oregon.
Today, I'm starting "Makeover Monday." Each week, I'm going to select one image from our Lightroom catalog (NEF) and give it a makeover. NEF files straight out of the camera are dull and can always be improved with processing.
I will post both images; the image straight out of the camera and the image with the makeover. Then, I will explain what I did to achieve the results I wanted.
This image was selected for a makeover because, it is one of a series of images we are presently developing, to be uploaded soon to our Baby Boomer gallery.
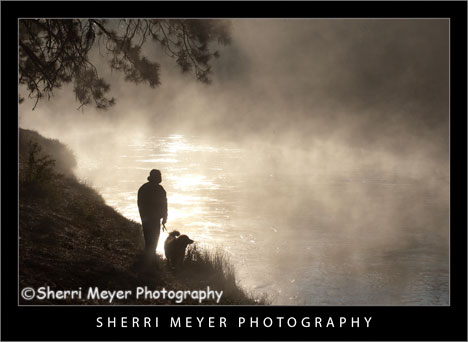 Photo #2 - A foggy morning along the Deschutes River, Oregon.
Photo #1 -
 to get the results above, I changed the White Balance to Daylight to warm it up a bit. Then, I applied this
wonderful Nikon D300 Preset developed by Christian Løverås of Oslo, Norway. We just started using this preset yesterday and we love it! I then used the Adjustment Brush to tone down the over exposed glare on the water.
Photo #2 - this is the NEF the way it looked straight out of the camera
.
Which one do you like best?
Thank you for visiting. If you would like to leave a comment, simply click on the "comments" link (add your message in the box) at the bottom of this post.
You can also sign up for a "free" subscription to this Blog. Just look in the upper right hand side of the Blog under "Subscribe to Sherri's Blog." Then, either click on the orange button, or enter your email address and click on "subscribe."
Visit our
Stock Photo Website for links to photo galleries.
by Sherri on January 30, 2009
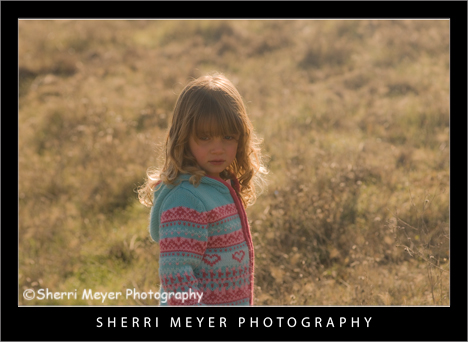
Portrait of Maya Bussinger #3, Cronan Ranch Regional Trails Park, Pilot Hill, California.
In my
previous post, I had two examples of experimenting with "clarity" in the develop module of Adobe Lightroom 2.1. When working with clarity, you can choose to increase or decrease the amount of clarity in the original photo.
In one of the photos in my previous post, I left the clarity set at normal. For the other one, I decreased the clarity to -100. You can also increase it the same way, or as in both cases, you can find a balance.
Thanks to
Gary Crabbe of Enlightened Images for suggesting that I play around with it a little more. For the photo above, I set the clarity at -50, which was right in the middle of my previous two examples.
One of the really neat things about photography is that most of the time, there is no right or wrong. The final decision is a matter of personal choice. I'd love to hear what your personal choice is. Which of the 3 photos do you like best?
Thank you for visiting. If you would like to leave a comment, simply click on the "comments" link (add your message in the box) at the bottom of this post.
You can also sign up for a "free" subscription to this Blog. Just look in the upper right hand side of the Blog under "Subscribe to Sherri's Blog." Then, either click on the link and choose your reader, or type in your email address.
Visit
our Website for links to photo galleries.
by Sherri on January 28, 2009
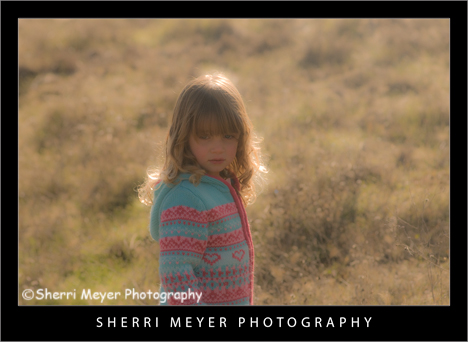
Portrait of Maya Bussinger #1, Cronan Ranch Regional Trails Park, Pilot Hill, California.
You can probably tell by now that I love Adobe Lightroom 2.1. I've been doing a lot of experimenting with it lately and here is something else I learned that might be of interest to you.
The photo above was created from the original photo (photo #2), by simply adjusting the "clarity" in the development module of Lightroom 2.1. The original photo was a little bit harsh. By adjusting the "clarity" to -100, I gave this portrait of Maya a much softer look.
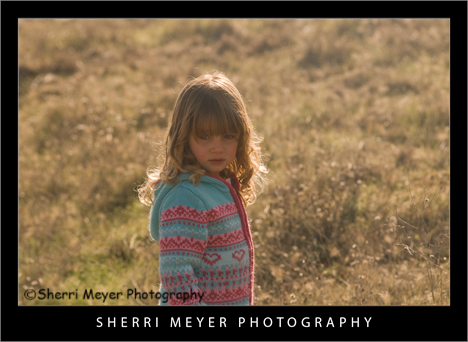
Portrait of Maya Bussinger #2, Cronan Ranch Regional Trails Park, Pilot Hill, California.
This is the original photo. Which one do you like best?
Thank you for visiting. If you would like to leave a comment, simply click on the "comments" link (add your message in the box) at the bottom of this post.
You can also sign up for a "free" subscription to this Blog. Just look in the upper right hand side of the Blog under "Subscribe to Sherri's Blog." Then, either click on the link and choose your reader, or type in your email address.
Visit
our Website for links to photo galleries.
by Sherri on December 18, 2008
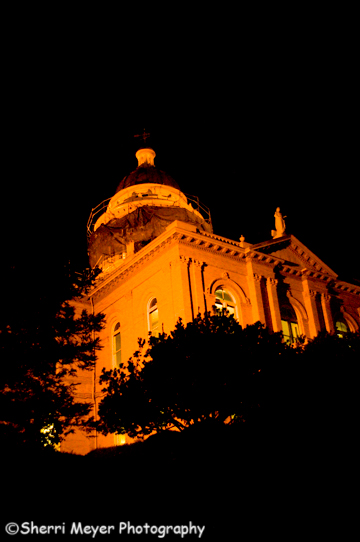 Historic Auburn Courthouse at night, Old Town Auburn, California
This shot was also taken during our recent visit to Old Town, to check out the holiday decorations. I have photographed this beauty several times before, but never from this perspective and never at night.
Most of the shots that were taken during this photo shoot were shot at ISO 3200 and 6400. This one was shot at ISO 6400. It was a really good opportunity to put the
Nikon D300 to the high ISO test. It also gave me a good reason to experiment with the Noise Reduction feature in
Adobe Lightroom 2. I am very pleased with the results.
I highly recommend the Nikon D300, to anyone looking for an affordable Pro-level Nikon DSLR camera. I am also blown away by the features and performance of Lightroom 2 and I highly recommend that as well.
Thank you for visiting. If you would like to leave a comment, simply click on the "comments" link at the bottom of this post.
Visit
our Website for links to photo galleries.
 Photo #1 - A foggy morning along the Deschutes River, Oregon.
Today, I'm starting "Makeover Monday." Each week, I'm going to select one image from our Lightroom catalog (NEF) and give it a makeover. NEF files straight out of the camera are dull and can always be improved with processing.
I will post both images; the image straight out of the camera and the image with the makeover. Then, I will explain what I did to achieve the results I wanted.
This image was selected for a makeover because, it is one of a series of images we are presently developing, to be uploaded soon to our Baby Boomer gallery.
 Photo #2 - A foggy morning along the Deschutes River, Oregon.
Photo #1 - to get the results above, I changed the White Balance to Daylight to warm it up a bit. Then, I applied this wonderful Nikon D300 Preset developed by Christian Løverås of Oslo, Norway. We just started using this preset yesterday and we love it! I then used the Adjustment Brush to tone down the over exposed glare on the water.
Photo #2 - this is the NEF the way it looked straight out of the camera.
Which one do you like best?
Thank you for visiting. If you would like to leave a comment, simply click on the "comments" link (add your message in the box) at the bottom of this post.
You can also sign up for a "free" subscription to this Blog. Just look in the upper right hand side of the Blog under "Subscribe to Sherri's Blog." Then, either click on the orange button, or enter your email address and click on "subscribe."
Visit our Stock Photo Website for links to photo galleries.


